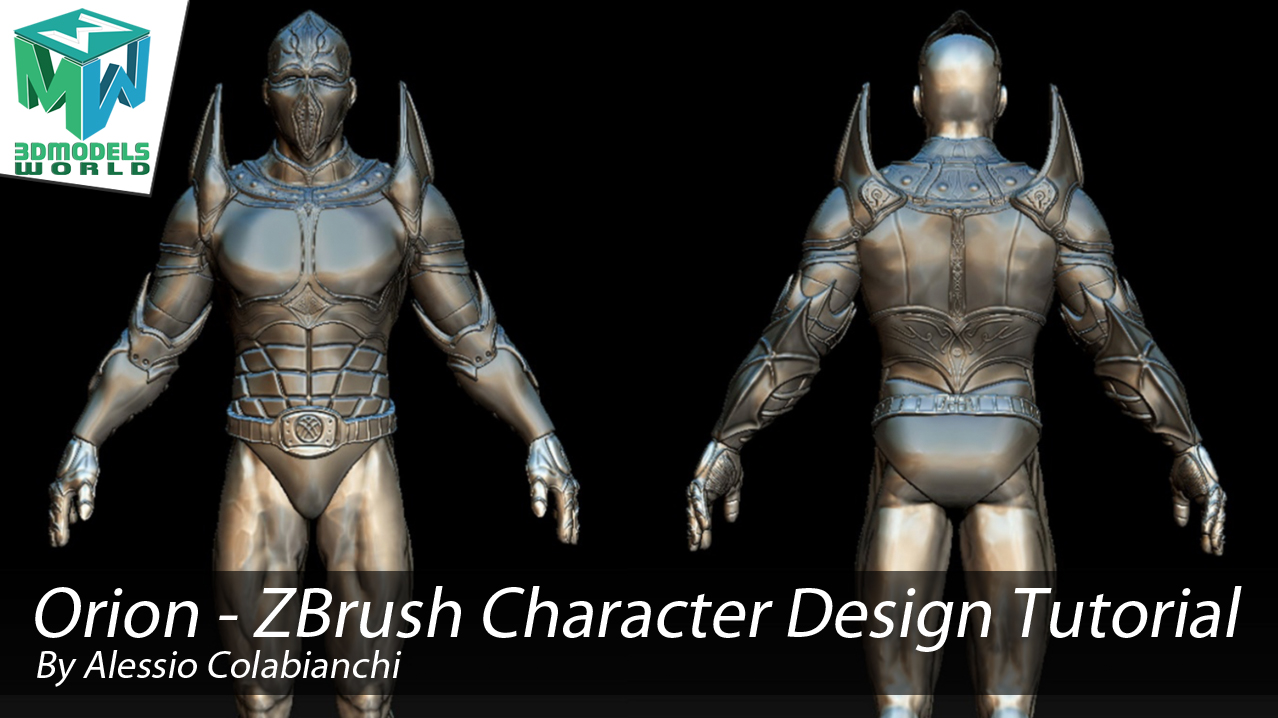
Tutorial on Orion: The Knight of the Abyss
Hello guys! we would like to introduce to you (Alessio Colabianchi 3D Artist) he is a very talented artist and he created this very cool workflow tutorial for designing and sculpting fantasy characters in ZBrush, feel free to check his website at the end of this tutorial, hope you guys will benefit from his workflow and find a way to incorporated in your own work as well.
Introduction
Hello to everyone, I will use an informal style for this tutorial in order to explain each step of the creation of this character for game design in the cleanest and easiest way possible.
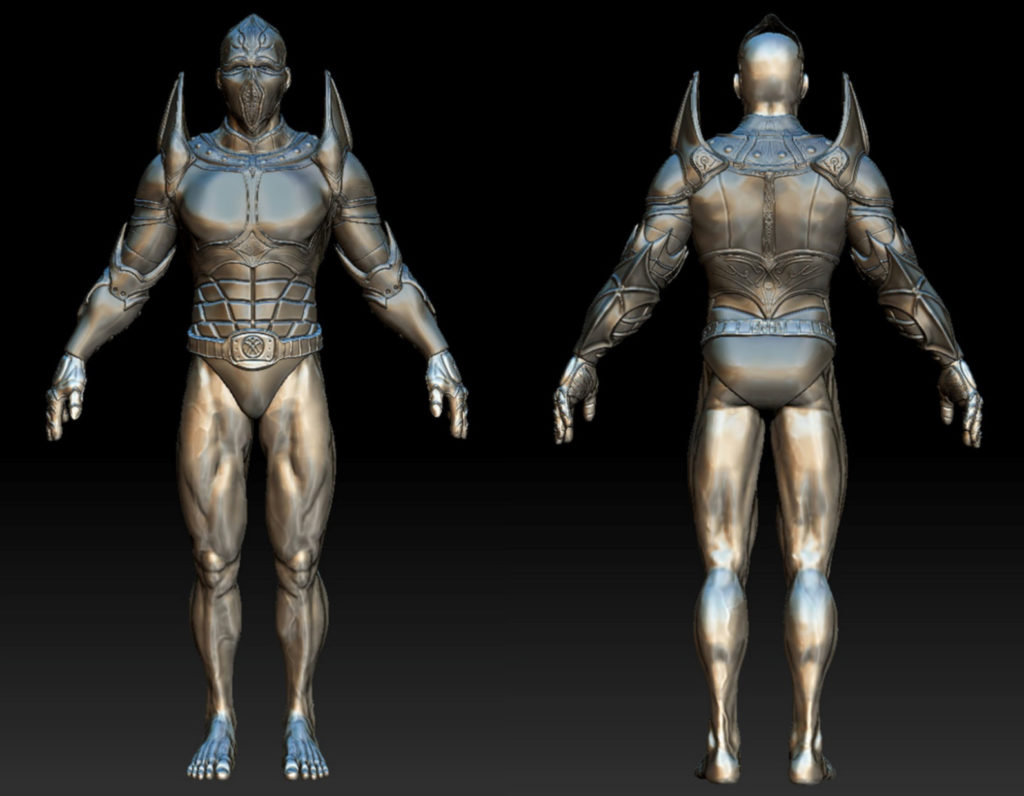
I am Alessio Colabianchi, I am a 3D artist and a student in 3D Game Design master course at Staffordshire University. I am going to explain you how to create one of my best work, Orion The Knight of the Abyss. It is a completely hand sculpted 3d model and it requires lots of time and patience, but I can ensure you that the result will be great.
Following this tutorial you can’t only reproduce my work, but you can use it to improve your skills in ZBrush and in 3d modeling in general and use these new knowledges to create your own character. Let’s start!
1. The idea and concept art
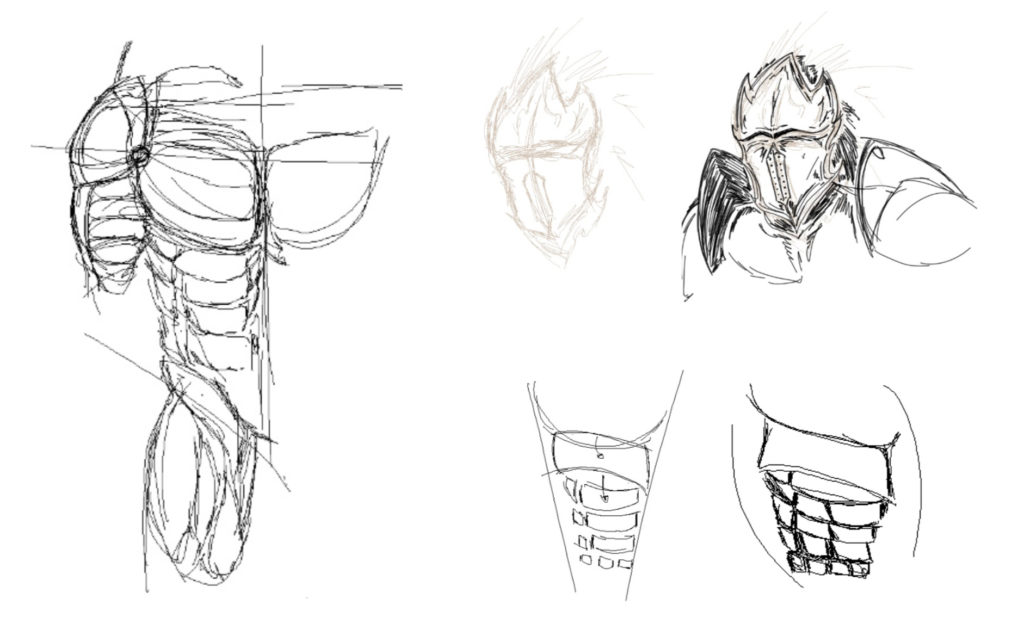
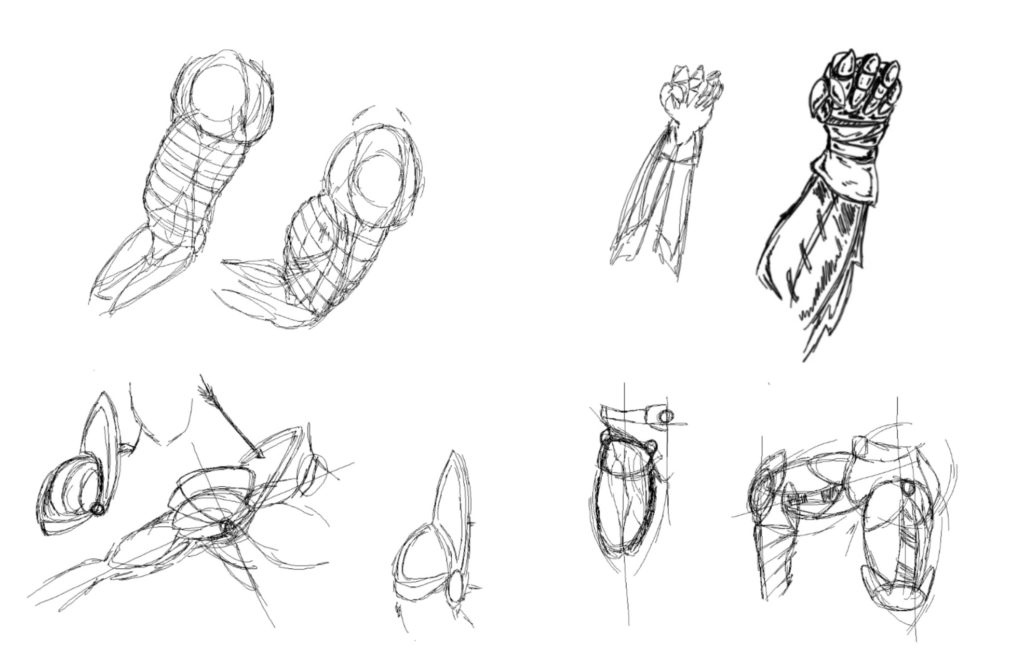
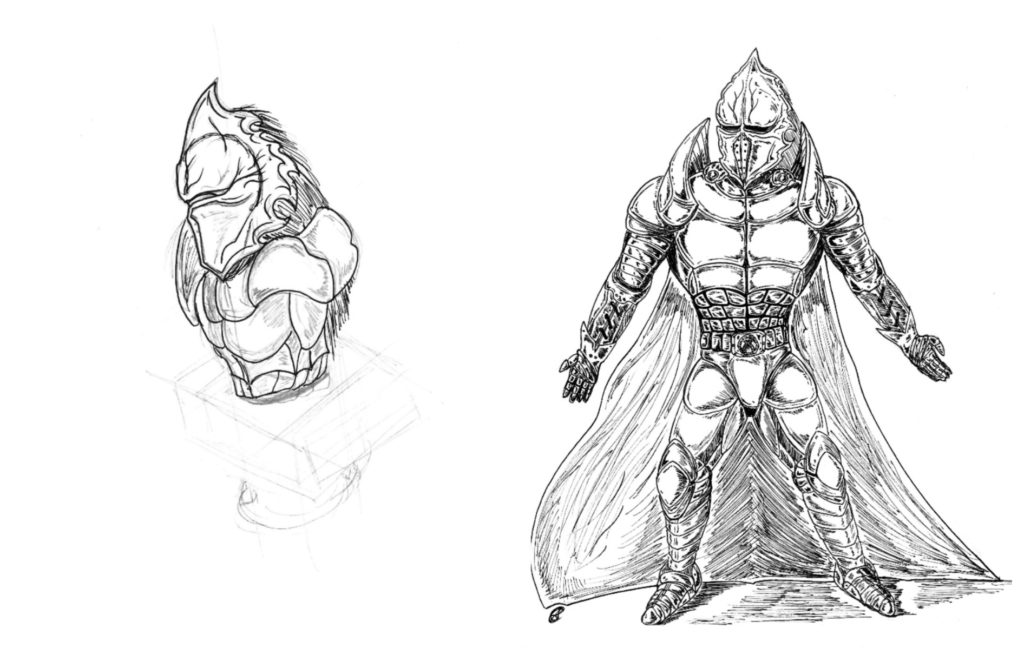
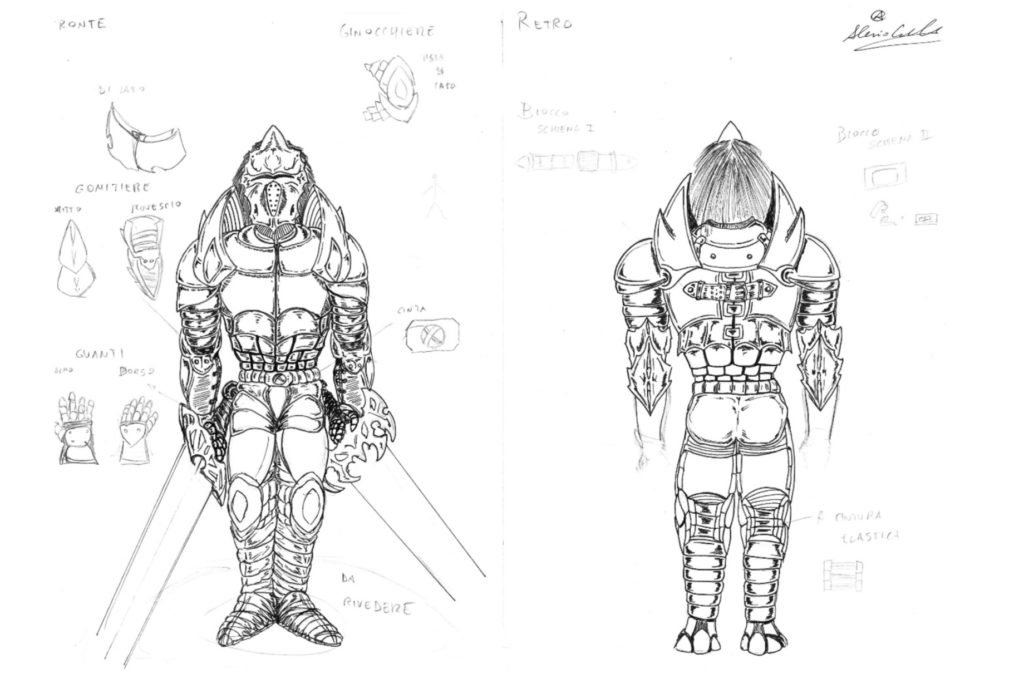
You can not start any project without a clear idea of what you want to achieve. The best thing is to write a list of the characteristics that we want to give to our character, or even better, to draw him.
The concept art is basically the drawing of our idea, and you don’t have to be a super artist or drawer to make it, you can just look online for what you want to create, maybe the boot of a viking warrior and the chest of a medieval armor for example.
However, it is always better to make some sketches of the character and of its features.
Here are some examples of those made for this character.

2. Start in ZBrush
If you already know the program starting with sculpting a basic anatomical figure should not be difficult, but if someone wants to start using ZBrush from this tutorial, it is my job to inform him about the basic tools and the interface we’re going to use.
2.1 Interface and navigation
In general, ZBrush’s interface is quite different from others, but different does not mean better or worse. I find it very fast to work with, once you get used to it. But, let’s try it out so that you can judge for yourself.
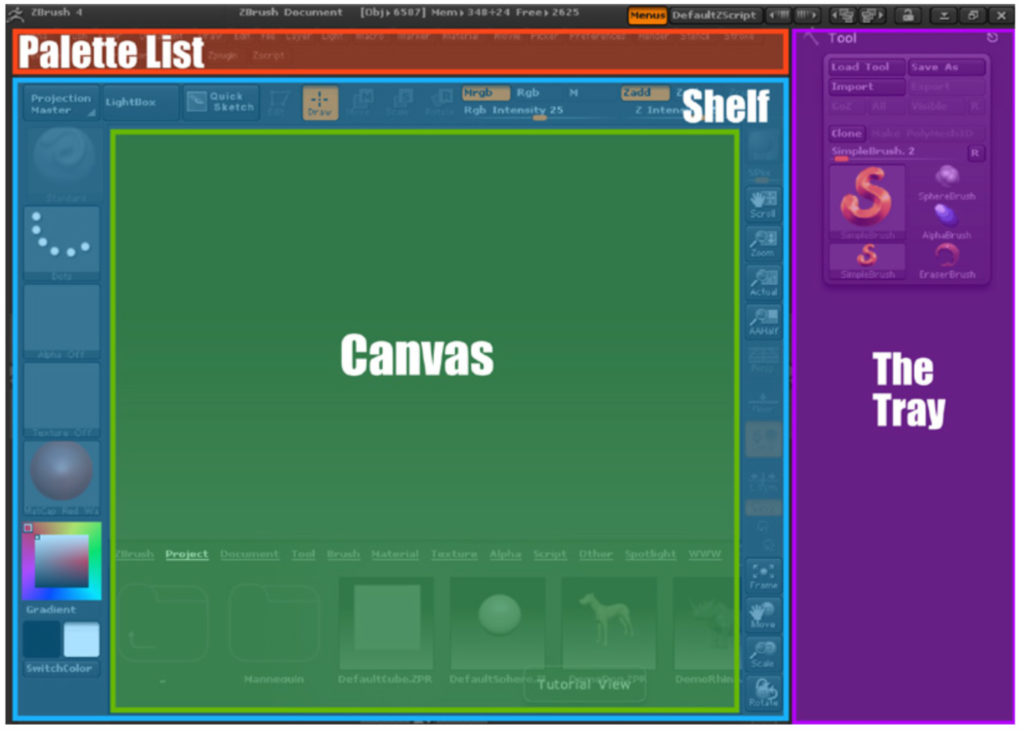
If you start ZBrush for the first time, your screen should look similar to the next screenshot:
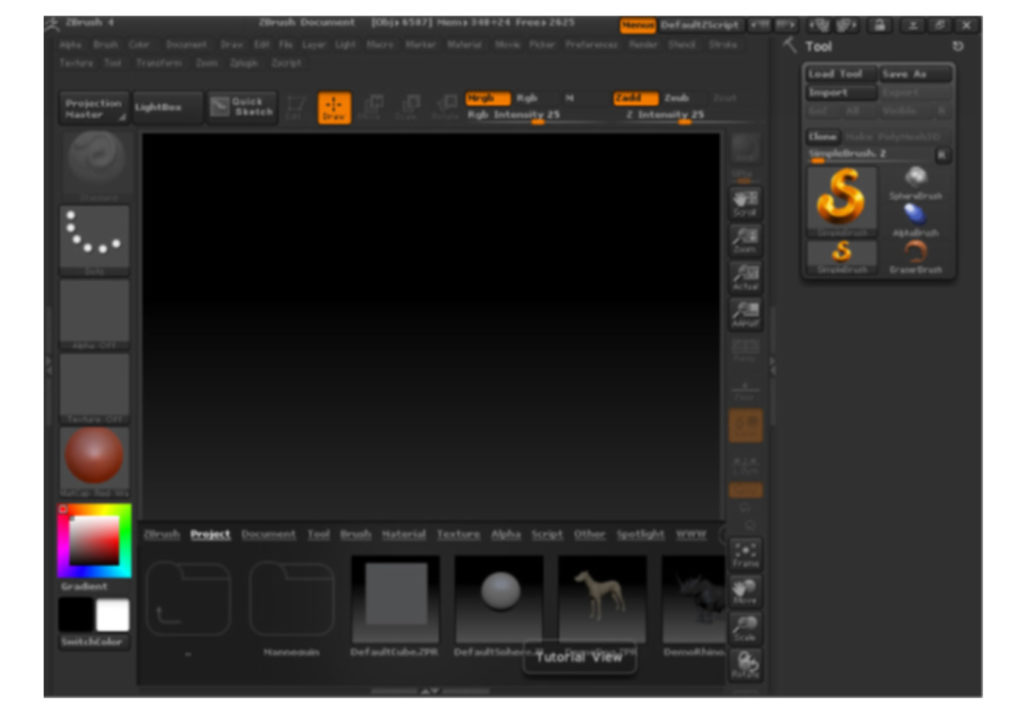
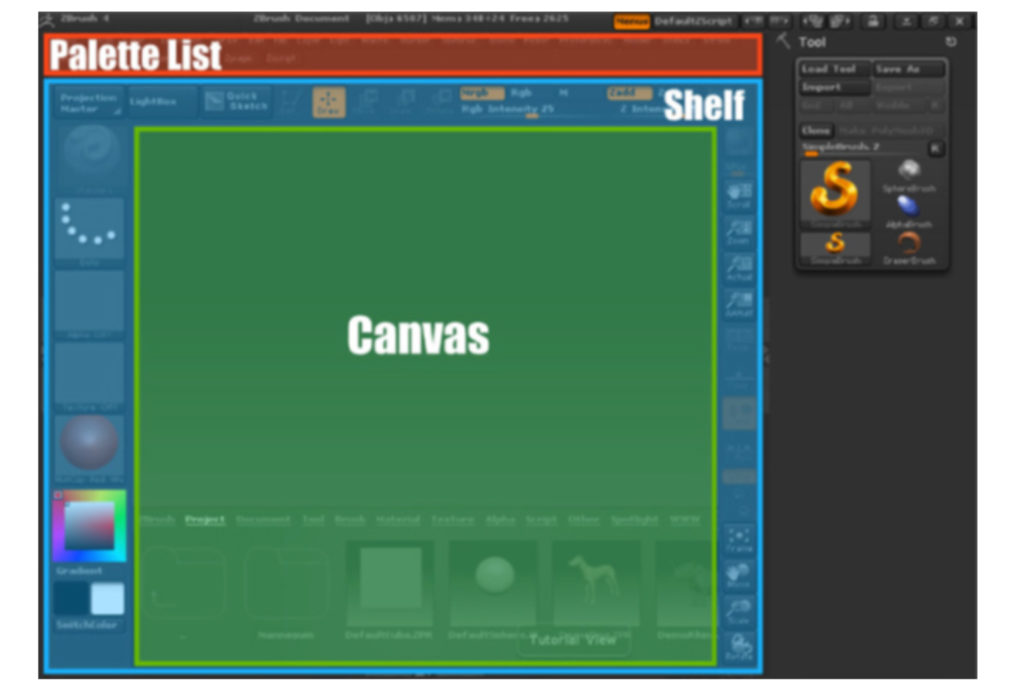
You’ll probably notice that the biggest part of your screen is the work area, called the canvas, where you sculpt or paint your models. By default, the canvas is empty.
It is surrounded by the shelf where the most important functions are located to access them more quickly.
At the top of your window, you’ll find the Palette List, where every function of ZBrush can be found. Also notice that the palette list is sorted alphabetically, which is not the common way of sorting menus, but is still very effective.
To better learn the controls, let’s try to navigate in 3D space. If you’re using a pen tablet, a left-click means touching the tablet with the tip of the pen.
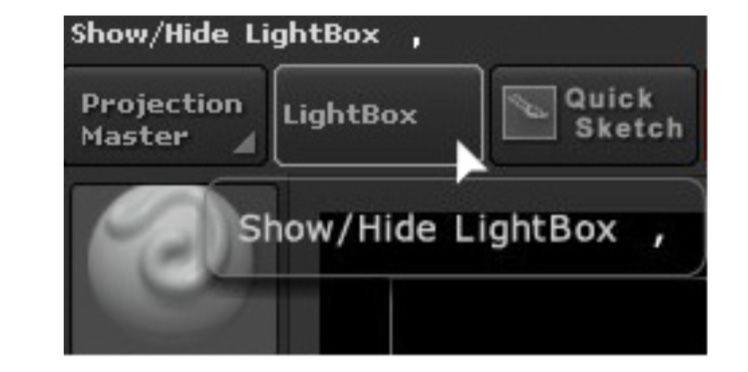
1. Before we start, we have to load a model to navigate around. Open the Lightbox by clicking its button, which is also labeled Lightbox, as shown in the next screenshot:
2. In the Lightbox that opens, choose the DefaultCube.ZPR by double-clicking on it.
3. If prompted, choose not to save any changes. Left-click anywhere on the cube to start sculpting by pushing the surface outwards.
4. When holding Alt while left-clicking, it will inverse the direction and push the surface inwards.
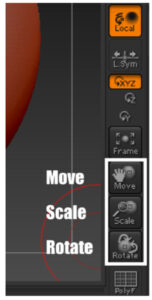
5. Left-click and drag on one of the three buttons Move, Scale, and Rotate to navigate in your 3D Scene. They are located on the lower right side of the shelf, as shown in the next screenshot.
6. If something goes wrong, just reload the default Cube from Lightbox.
7. Because we’ll navigate all the time when modeling in ZBrush, let’s see how we can use some hotkeys to speed things up a bit:
To Rotate your model, left-click anywhere on an unoccupied area of the canvas and drag the mouse.
To Move your model, hold Alt while left-clicking anywhere on an unoccupied area of the canvas and drag the mouse.
To Scale your model, Press Alt while left-clicking anywhere on an unoccupied area of the canvas, which is moving.
Now release the Alt key while keeping the mouse button pressed and drag.
More on the interface – The Tray
You’ve probably noticed that we haven’t talked about the rows on the left-hand side and right-hand side of the screen, The Tray. By default, only the tray on the right-hand side is open and shows the tool palette. The point about the trays is that you can decide which palette they hold and also hide them to have a bigger canvas area to work with. Let’s try that out, as shown in the next screenshot:
Time for action – using the Trays
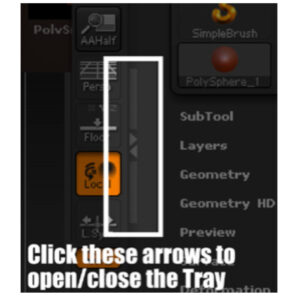
1. Open and close the right tray by clicking on the small arrow symbol on its left border, as shown in the next screenshot:
2. Open the hidden tray on the left-hand side of the screen, so that both trays are open.
3. Now let’s move the tool palette from the right tray to the left. To do so, click-and-drag the tool palette handle from the right to the left tray.
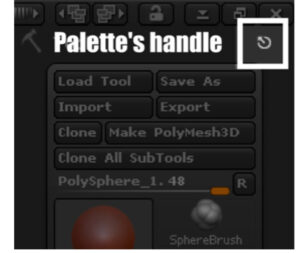
4. Let’s put another palette into our right tray, which is now empty. Open the Document Palette from the Palette List at the very top of your screen and drag its palette handle to the right tray, as you did in the previous step.
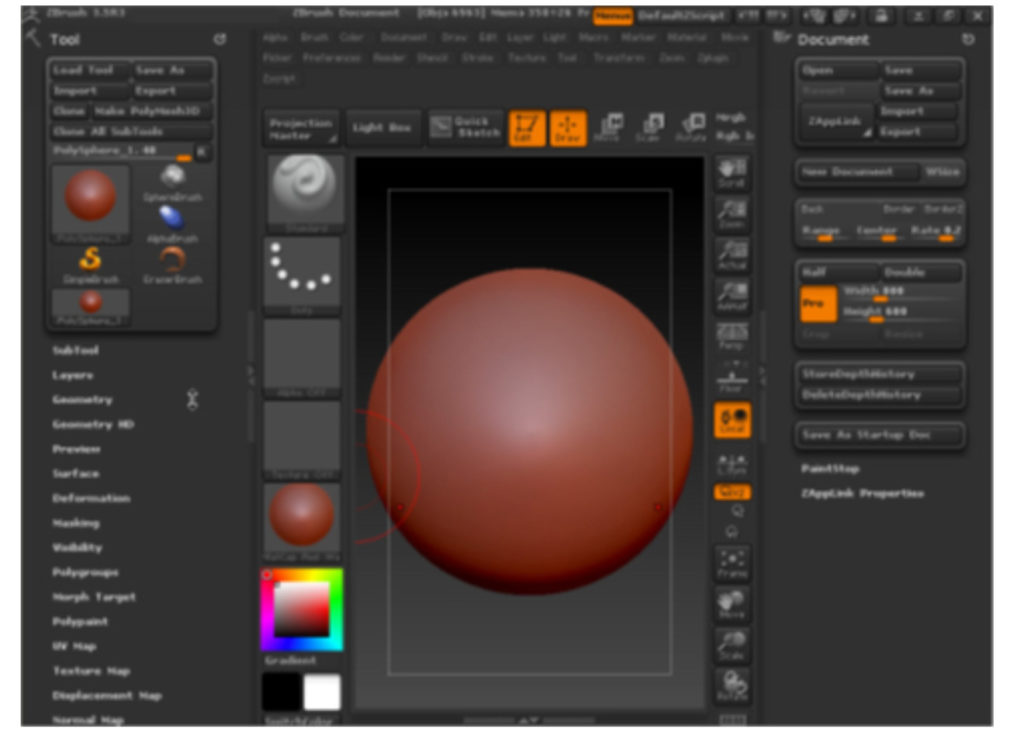
5. Your screen should now look similar to the next screenshot with the tool palette docked in the left tray and the document palette in the right:
Palettes
If you click on a palettes icon, instead of dragging, the palette will either be thrown out of the tray, or be put into the right tray by default. If you drag a palette from the palette list into a tray, it will still be there in the palette list, only a copy is put into the tray. So you don’t have to worry about “losing” palettes.
Trays
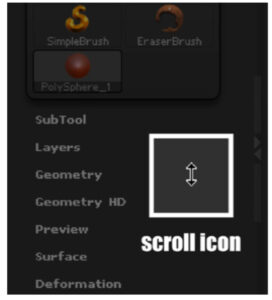
Trays can also have multiple palettes in them. If a palette has more menu entries than your screen can display, or if you have multiple palettes in one tray, you can scroll through them. Scrolling in a tray can be done by left-clicking in an unoccupied area in the tray, as shown in the following screenshot. This is the same principle as for rotating models by clicking in an unoccupied area:
Try exploring the interface more. There’s much to be found. These tips will help you on your tour.
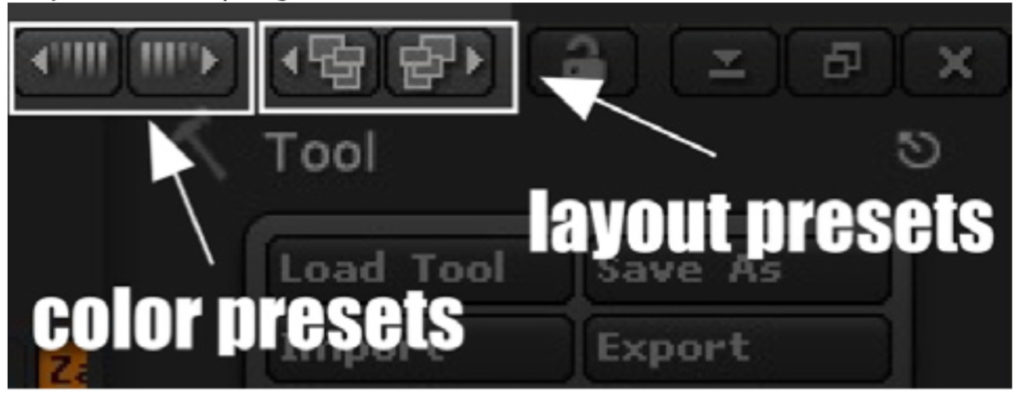
1. In the top-right corner of your window, there are two pairs of buttons with layout presets and color presets. Simply change them to your liking. Different layouts can also be useful for different tasks. The interface “Sculpt01” for example, is designed to efficiently handle sculpting tasks.
2. ZBrush will display the name of the chosen layout in the Note Bar. In the following screenshot, the layout “Sculpt01” was chosen.

3. If you want to save your screen layout, navigate to Preferences | Config | Store Config in the palette list at the top of your window, which will store a configuration file. This will save all your presets, to be loaded on every startup. In the Preferences, you can also find many useful options, such as for using ZBrush with a tablet or to take full advantage of multiple cores for displaying your models. Just remember that your changes will be lost the next time you restart ZBrush if you haven’t saved a configuration file.
4. The Note Bar is very helpful if you’re not sure about the function of any button. Simply place your cursor over it and ZBrush will display a short info about it in the Note Bar at the top left-hand corner of your screen. If there’s a hotkey for this function, it will also be shown. No need to read boring hotkey lists anywhere, it’s right there under your cursor.
2.2.Sculpting the anatomical character
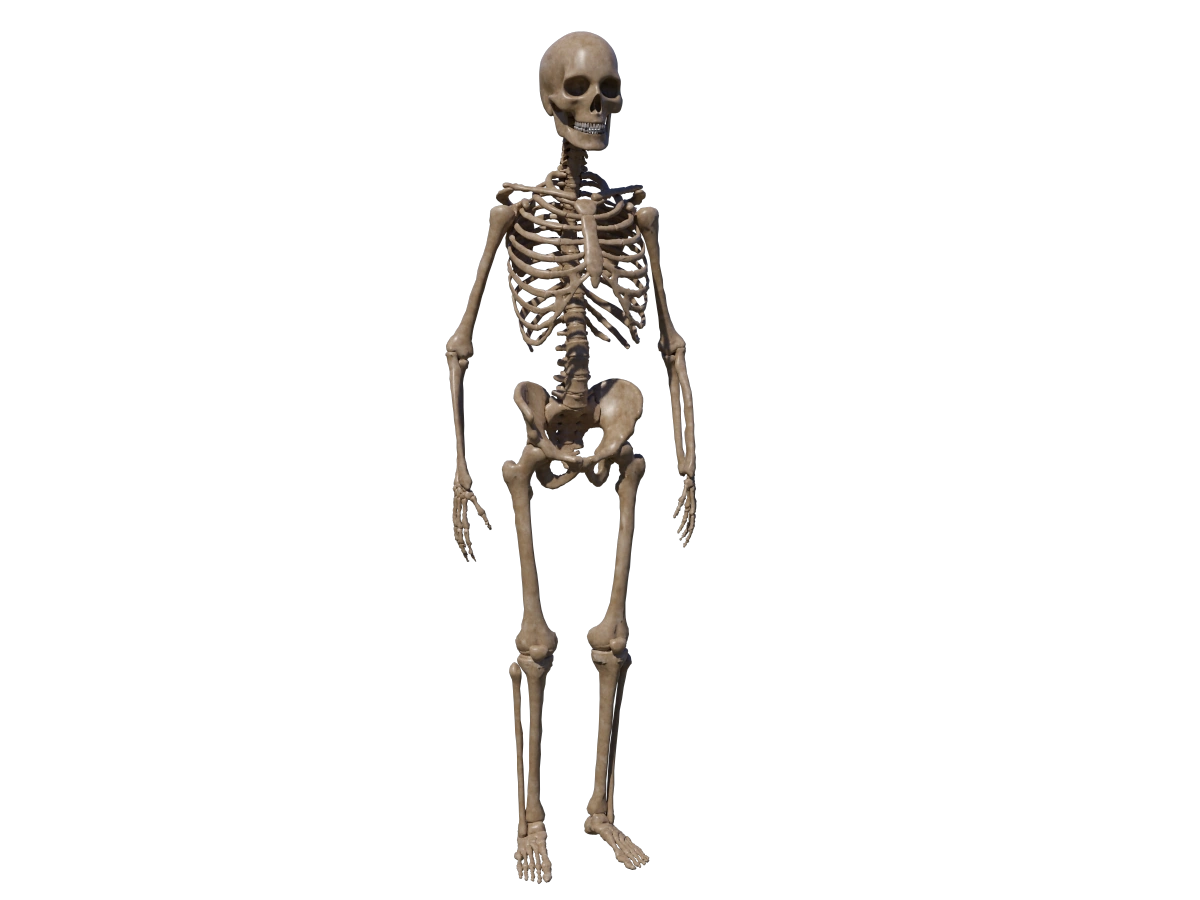
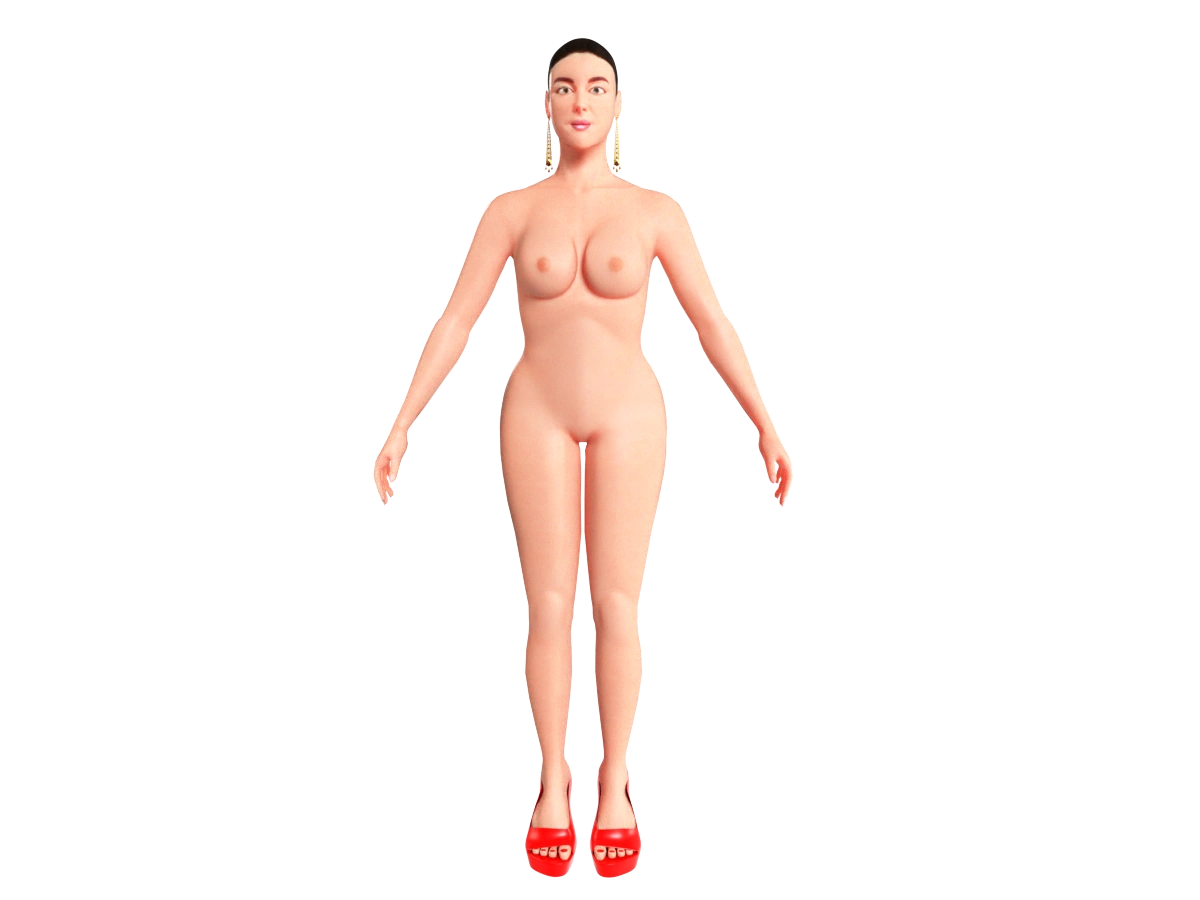
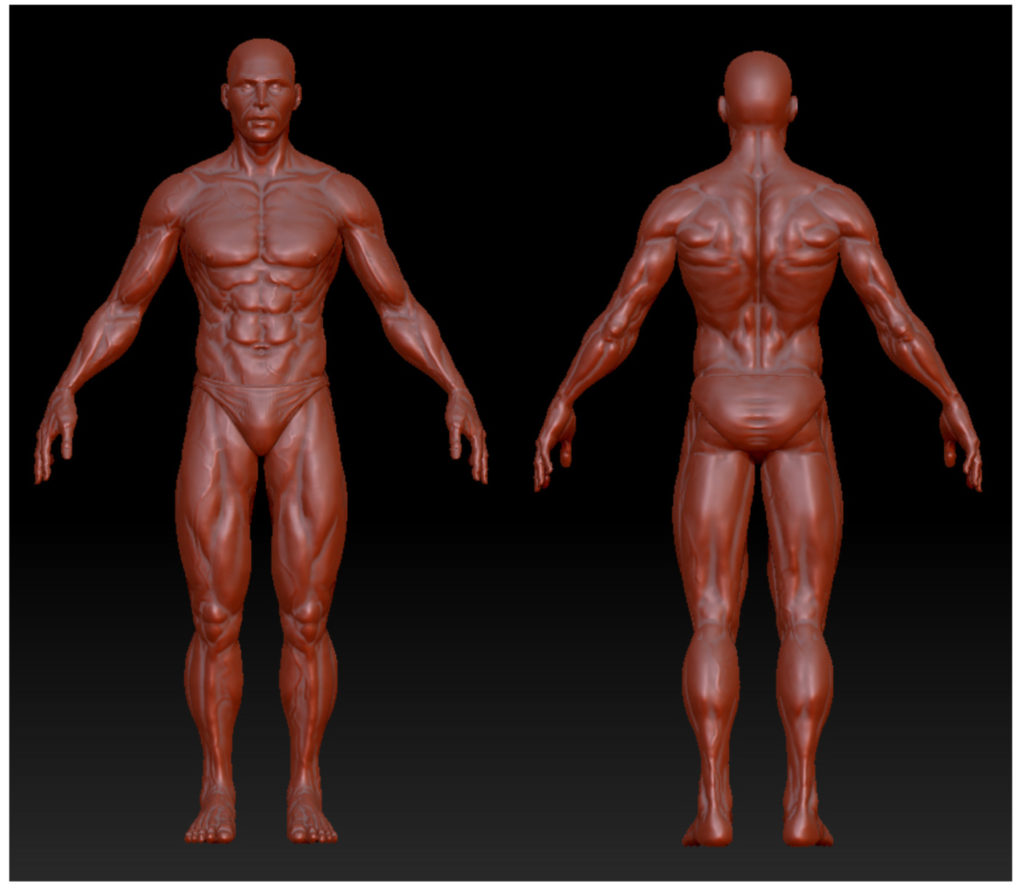
Now we can start sculpting the mesh we are going to use as base for the armor. We need to sculpt an anatomical model, male or female, it doesn’t mind. In my case, I sculpted as a personal exercise and work an accurate anatomical male mesh.
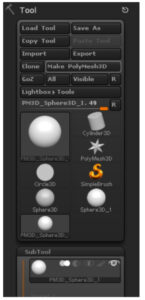
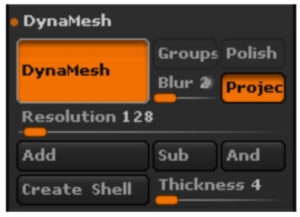
I started from a 3D Sphere, clicked on Make Polymesh 3D in the Tool Palette, and used the Dynamesh option under the Geometry Palette. Doing so, you will maintain the basic topology of the sphere, made by small quads. This is really important during the sculpting process because the Dynamesh allow us to be free of sculpt really great details without a huge polycount.
My advice is to use a 3D Sphere for each main body pieces, which are basically the head, the torso, the arms and the legs, even if you can also use only two spheres and extrude the arms and legs from the torso mesh. You just have to remember to turn on the Dynamesh every time you extrude too many polygons in order to no create hard edges or holes in the mesh. Do not mind about the resolution, keep it as default at the beginning as we are going to rise them only when adding details.
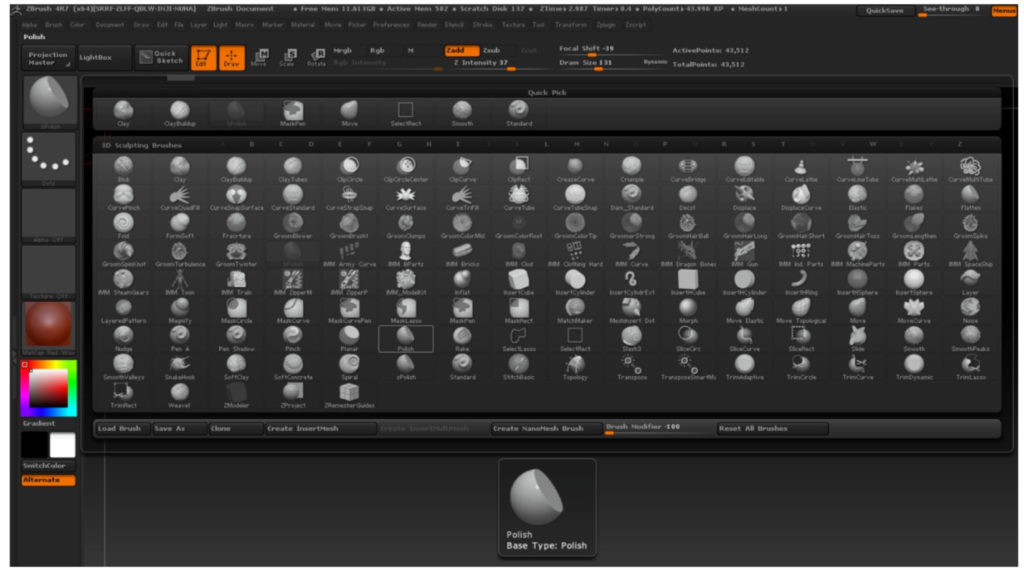
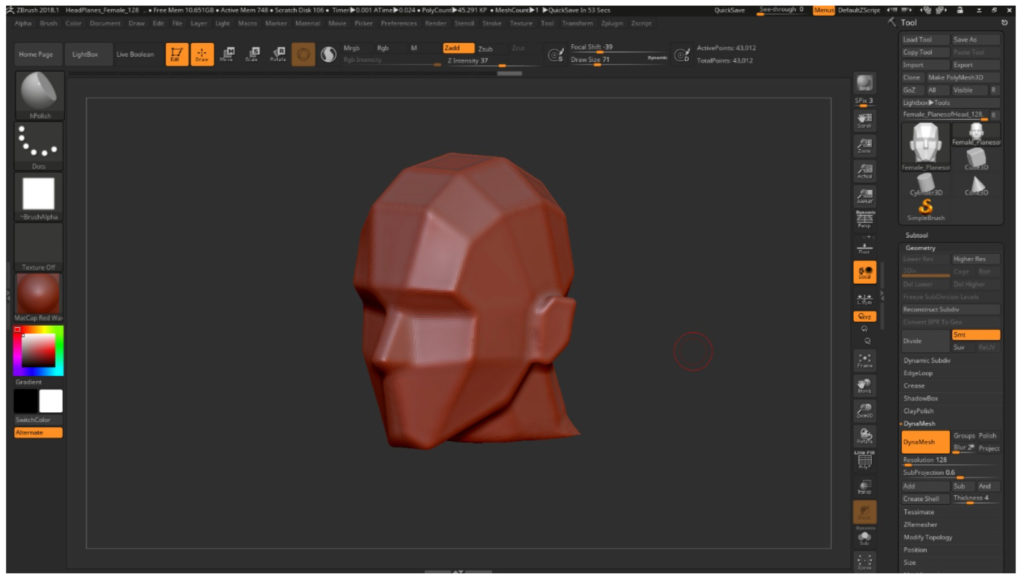
Now we should try to give to the mesh the basic shape of a body and we will start from the head. With a left click on the Brush button we can open the pre-set brushes palette, we will not use all the brush even if it is always great playing with them to understand what each of them can do. In the palette you have to select the hPolish, a brush which allows to easily create hard surfaces.
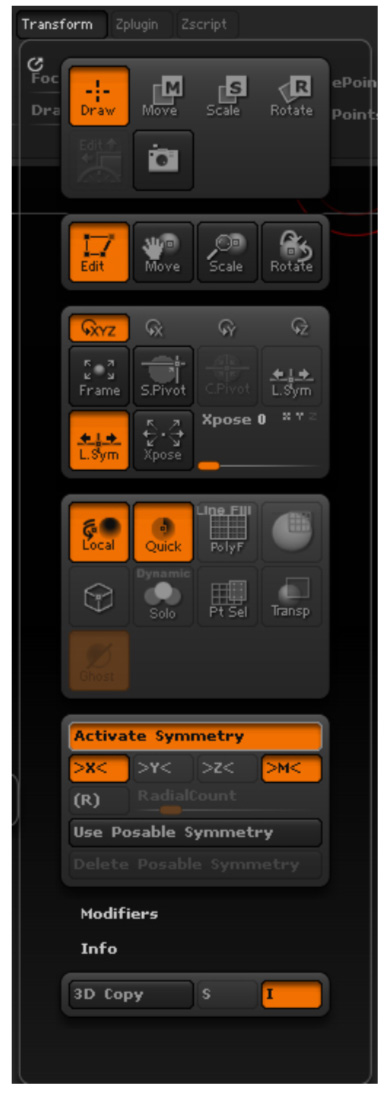
With this brush is really easy to sculpt the basic form of an head, but before starting sculpting, you have to be sure that your Symmetry is on, in order to not to do the double of the work. The option is set under Transform or you can just press X on the keyboard.
Then, pressing the Alpha button, select the white quad that will improve the action of the brush. Try to sculpt the sphere with left clicking and dragging the mouse. It would be better with a pen and a graphic tablet, but you can also do it with a mouse. This brush just subtract material by default, so if you want to add material you have also to hold the Alt key, and the Shift if you want to smooth the surface. Try to give to sphere the aspect of a stylized face like in the next screenshot.
It doesn’t mind if the edges are not perfect because in the next step we are going to smooth them trying to give to this face a more realistic shape. You can work with the Smooth option seen before, holding Shift and you can also decide to move some part of the meshes up or down to improve its aspect. The Move brush allows us in fact to move around only the selection inside the cursor.
If you want to add more details just use the Standard brush for softer shapes and the DamStandard brush to create grooves or reliefs, holding down the inverse, that is Alt.
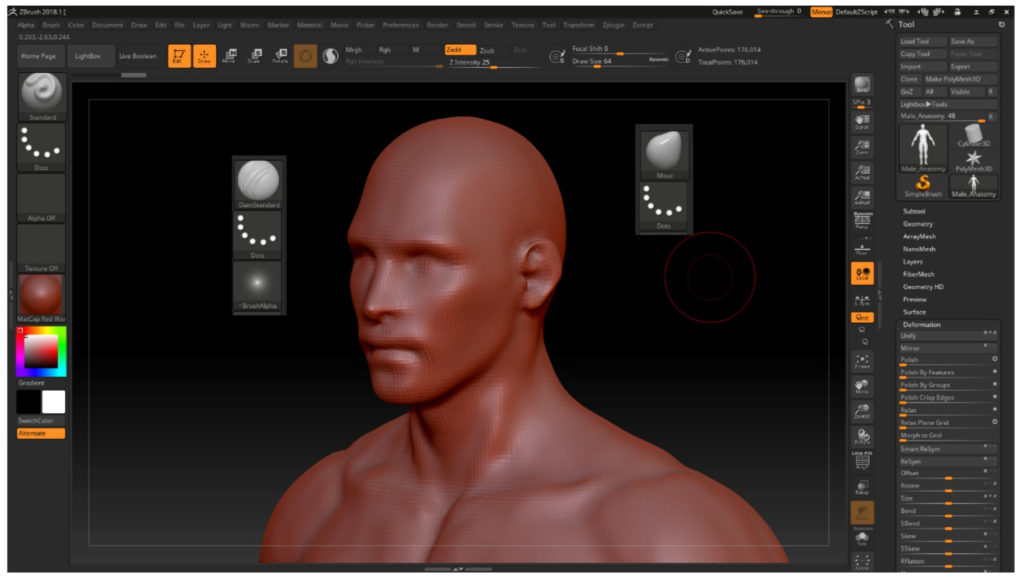
As you can see, by performing the work done on the head on every other part of the body you can define a male figure that can be used as a base. It is possible to move the material of the head or crate other subtools and give them the right shape following a right reference.
If you use the Clay Building brush it will be very easy to add material to your mesh, and by following the muscle fibers it will be possible to compose a limb in a short time. But we must always remember to reactivate the Dynamesh every time the polygons become too large to prevent strong angles.
Here an example of how the Clay Building works, it will be very useful also in future to create the armor.
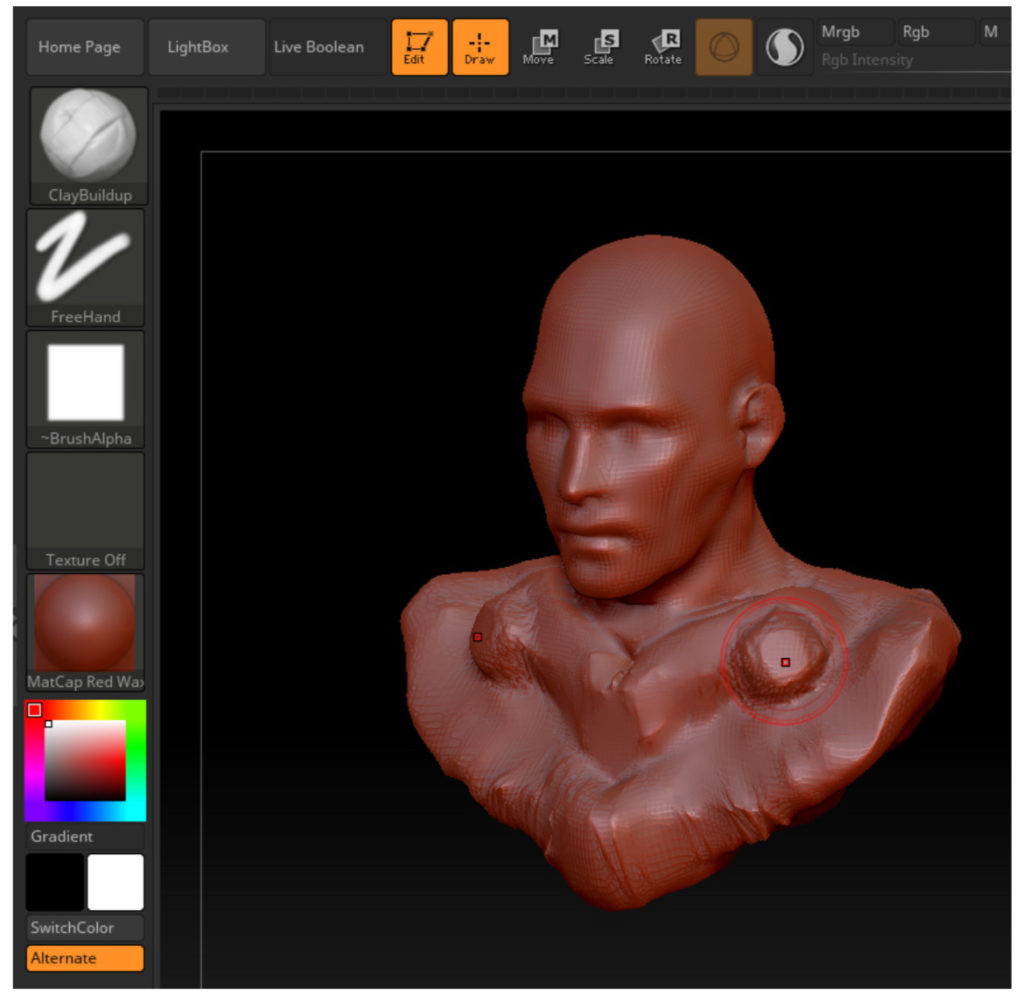
As you can see at the bottom, the polygons started colliding with each other, in that case you need to reactivate the Dynamesh and smooth the hard edges to avoid future problems.
Working in this way you should be able to complete all the body and the result should be similar the next screenshots. However, sculpting is a matter of experience, so do not be discouraged at the beginning, if it proves to be more difficult than expected continue to try or even follow some specific tutorials for the anatomical parts and then return to this one which is more focused on character design at armor level.
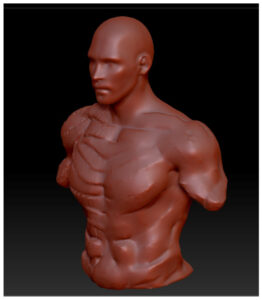
Once the bust is completed, you can extrude
other material for the legs, using the Dynamesh combined with the Inflat brush. On the other hand, you can also append a second Zsphere to your project and use it for your leg. My advice is to work only on the right leg as you can mirror it later on the other side using the option Mirror and Weld. Try to copy your reference about the leg muscles and lines in order to have a good shape that can be used as base for the armor, as for the rest of the body.
The same method can be used for the arm, the hands and the feet, but for the hands and the feet I suggest you to give them a basic shape like a winter glove or similar as you will work more on them later making the armor gloves.
The following image shows you my final result even if yours does not necessarily have to be so detailed. When you will have reached this point, you can start the video tutorial for each armor piece.

Thank you for following this tutorial that was created for “3DModelsWorld.com“.
Alessio Colabianchi